Orbital Settings My Account Page
The purpose of the My Account page in the Settings group is to display user account-specific information as well as allowing the user to configure their Orbital experience to their liking. The My Account page in the Settings group is shown in the figure below.
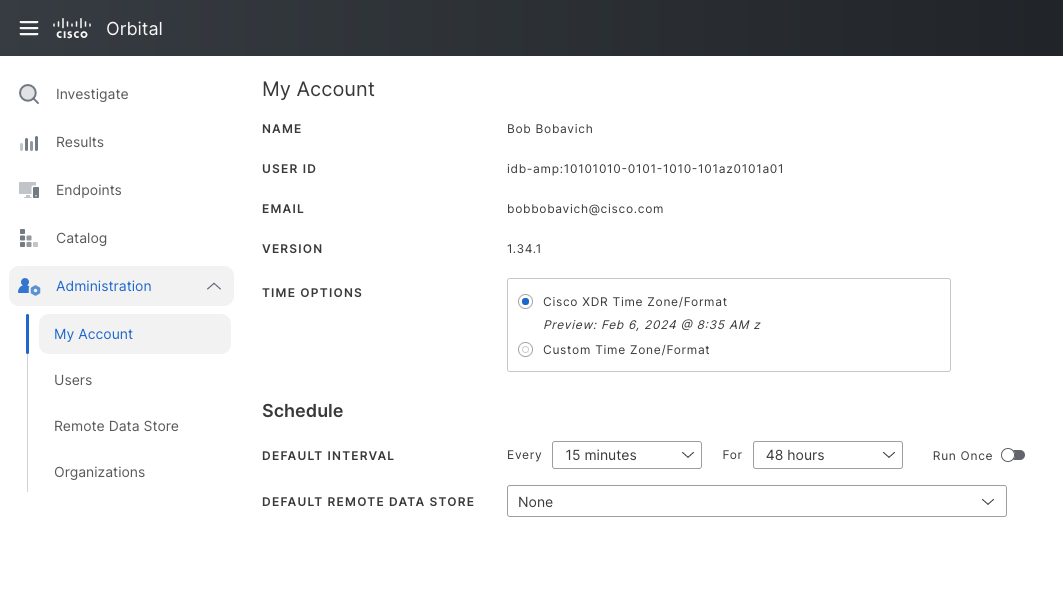
The My Account page consists of the following nine user interface elements:
| Element | Description |
|---|---|
| Name | This element is used to display the full name of the user. This display element is display only and cannot be edited. |
| User ID | This element displays the user ID that the client organization has assigned to the user. This display element is display only and cannot be edited. |
| This element displays the email that the organization has assigned to the user. This display element is display only and cannot be edited. | |
| Version | This element displays Orbital Service’s version number. |
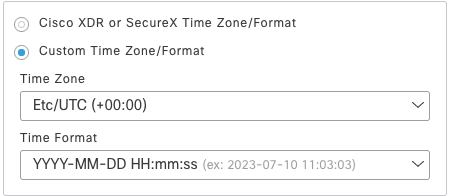
| Time Options | The Time Options dialog, shown in the figure below, is used to set the default time zone and time format for the account. The time zone and format will dictate how the time and date are displayed in user interface elements such as the Refreshed element, located on the Results page or the Last Seen column on the Endpoints page. The time zone and format does not affect the time and date of the query results or time listings for actions performed on endpoints. |
 |
|
| The Cisco XDR or SecureX Time Zone/Format radio button will tell Orbital to use the time zone and time format settings that Cisco XDR or SecureX uses. | |
| The Custom Time Zone/Format radio button will tell Orbital to use the time zone and time format settings the user will set in the Time Zone and Time Format dropdowns. | |
| The Time Zone dropdown is used to manually set the time zone where the user is located. Clicking on the dropdown will display a list of acceptable time zones. | |
| The Time Format dropdown is used to define the format that time will take. Clicking on the dropdown will display a list of available time formats and provide an example of that format. | |
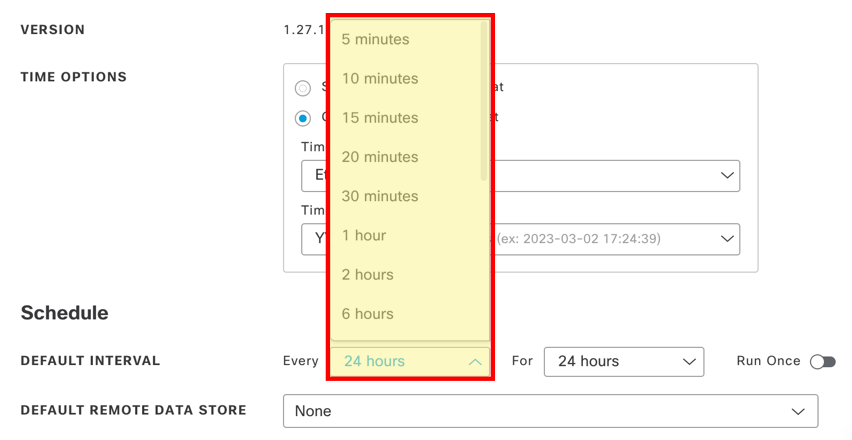
| Default Interval | This is a compound element and is used to define the default time frequency and duration for scheduled queries. It consists of the following three components: |
| The Every dropdown is used to set the query schedule’s frequency. A scheduled query’s frequency is how often it is run. For example, if you set this dropdown to 30 minutes, Orbital will run the query every 30 minutes. | |
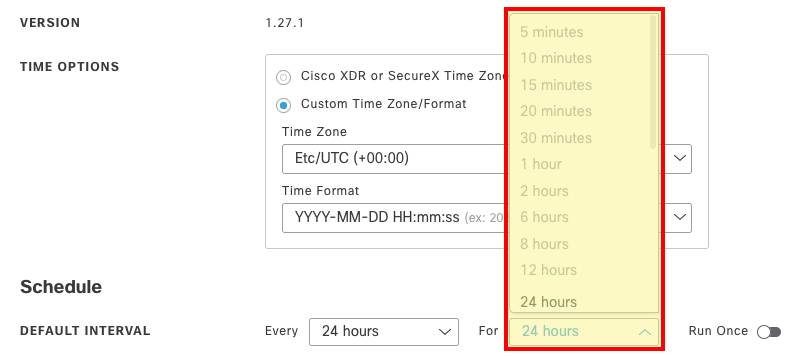
| The For dropdown is used to set the query schedule’s duration. A scheduled query’s duration defines the length of time that Orbital will keep a query in the execution queue before it will no longer run the query. For example, if you set this dropdown to 24 hours, Orbital will keep the query in its execution queue for 24 hours, after which, it will remove the query from its execution queue and no longer run the query. | |
| The Run Once toggleswitch is used to define how many times Orbital will run the query on each node. If this toggleswitch is set on, Orbital will only run the query once on each endpoint over the query’s duration. If the toggleswitch is set off, Orbital will run the query against each endpoint every time the query is scheduled to run. | |
| For example: | |
| If you set the Every dropdown to 30 minutes and the For dropdown to 24 hours, Orbital will run the query every 30 minutes over a period of 24 hours, after which, Orbital will stop running the query. | |
| If the Run Once toggleswitch is set off, Orbital will run the query every 30 minutes over a period of 24 hours against every endpoint in the organization, every time the query is run. | |
| If the Run Once toggleswitch has been set on, Orbital will run the query every 30 minutes over a period of 24 hours against each endpoint only once. This means that if the query is run against an endpoint once during the 24 hour duration, it will not be run again on that endpoint. This is useful when running a query against the entirety of an organization’s endpoints, but user is uncertain of which endpoints are online at what time. | |
| Default Remote Data Store | This element allows you to define one or more remote data stores that will be automatically used by Orbital to send your scheduled query results to. Clicking on this dropdown will display a list of the previously defined remote data store for you to choose from. Refer to the Orbital Settings Remote Data Stores Page topic for more information on defining and managing your organization’s remote data stores. |
Setting the Time Options
To set up your account’s default time zone and format:
- Select the My Account page from the Administration group, as shown in the figure below.

- Navigate to the Time Options dialog, shown in the figure below.
-
Select the desired time zone and format.
- Select the Cisco XDR or SecureX Time Zone/Format radio button to set your Orbital account’s time zone and time format to match the time zone and time format of your Cisco XDR or SecureX account.
or
-
Select the Custom Time Zone/Format radio button to customize your Orbital account’s time zone and format.
-
Click the Time Zone dropdown and select the time zone that is closest to you current geographical location.
-
Click the Time Format dropdown and select the format that your Orbital account will use for date and time.
-
Setting the Default Interval
To set up your account’s default Query Interval:
- Select the My Account page of the Administration group, as shown in the figure below.
- Select the default query schedule’s frequency from the Every dropdown, shown in the figure below.
- Select the default query schedule’s duration from the For dropdown, shown in the figure below.
- Turn on the Run Once toggle switch, shown in the figure below, if you only wish to have the query run once against your organization’s endpoints over the course of the query’s duration.

Setting the Default Remote Data Store
To set your account’s default remote data store:
- Select the My Account page of the Administration group, as shown in the figure below.
- Click on the Default Remote Data Store dropdown, shown in the figure below.
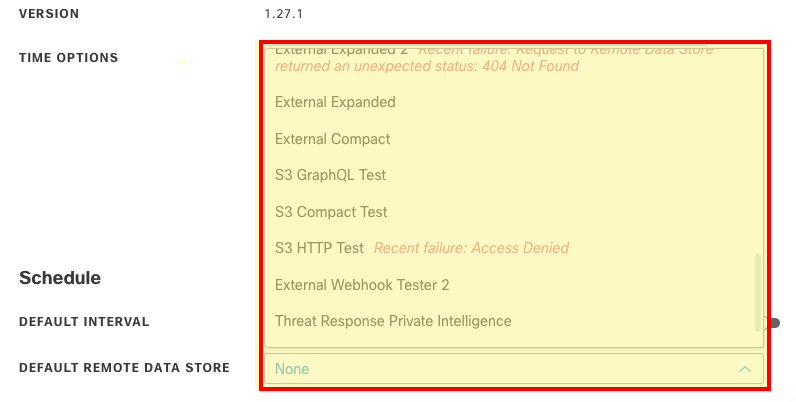
- Select the desired remote data store definition. This will populate the Default Remote Data Store dropdown with the name of the selected remote data store, as shown in the figure below.

Note: You may add multiple remote data store definitions to this dropdown if you need to have more than one remote data store to send results to.
Refer to Managing Your Remote Data Storage Definitions of the Orbital Settings Remote Data Stores Page topic for more information on adding new remote data store definitions and managing existing definitions.