Using Orbital Queries
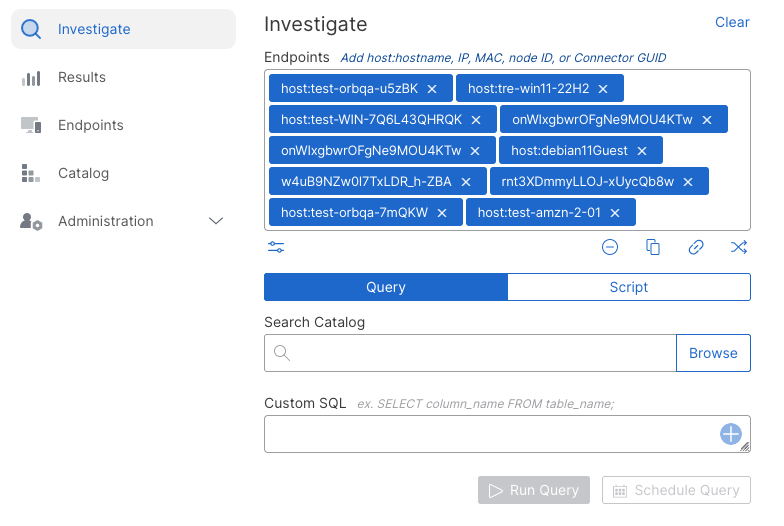
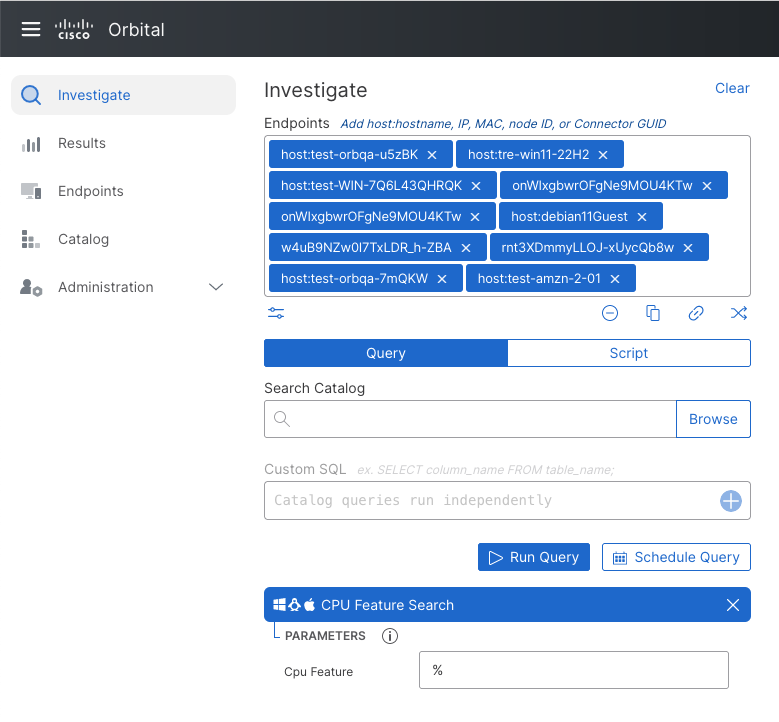
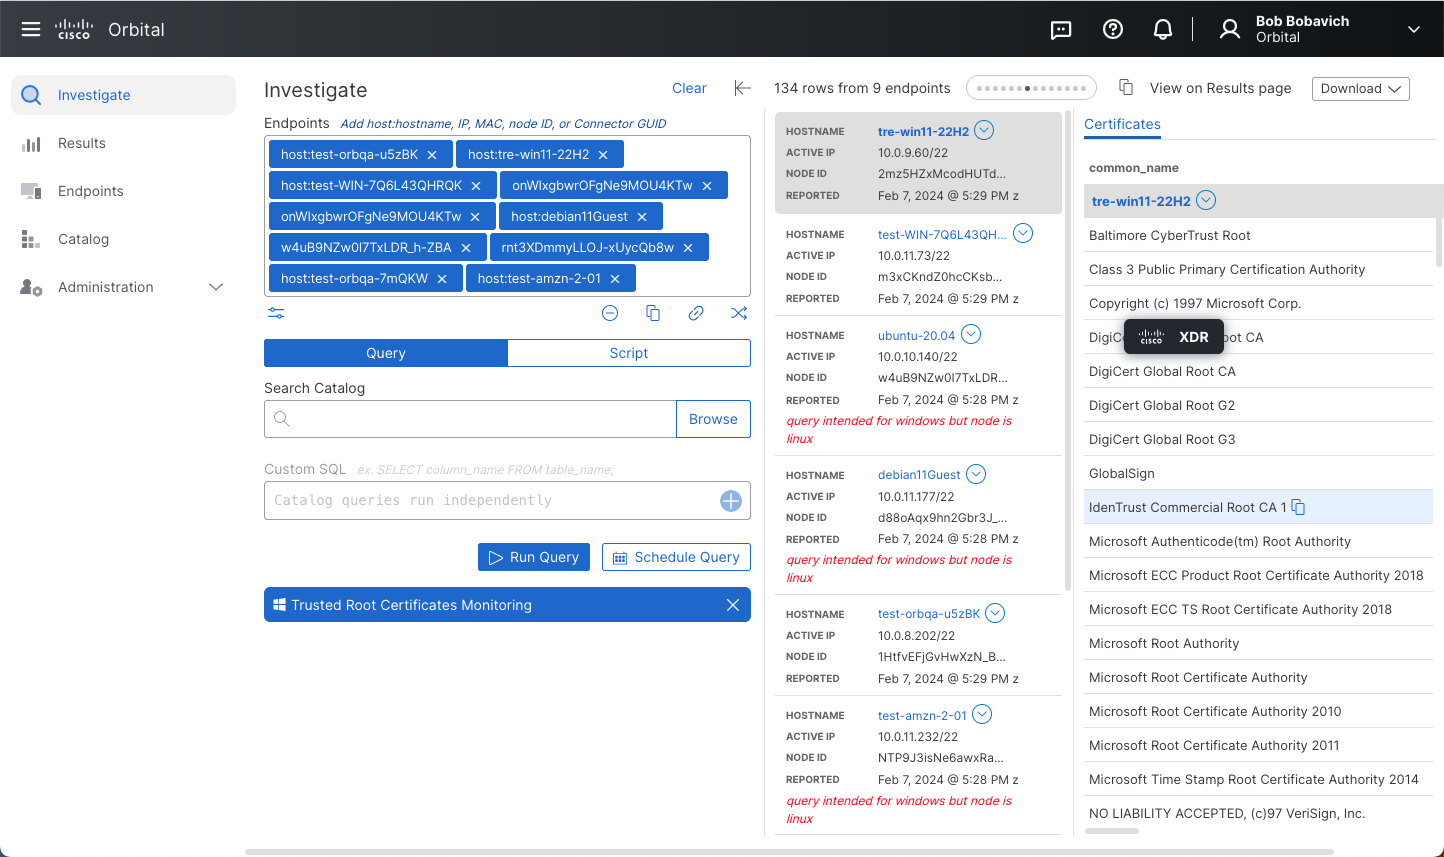
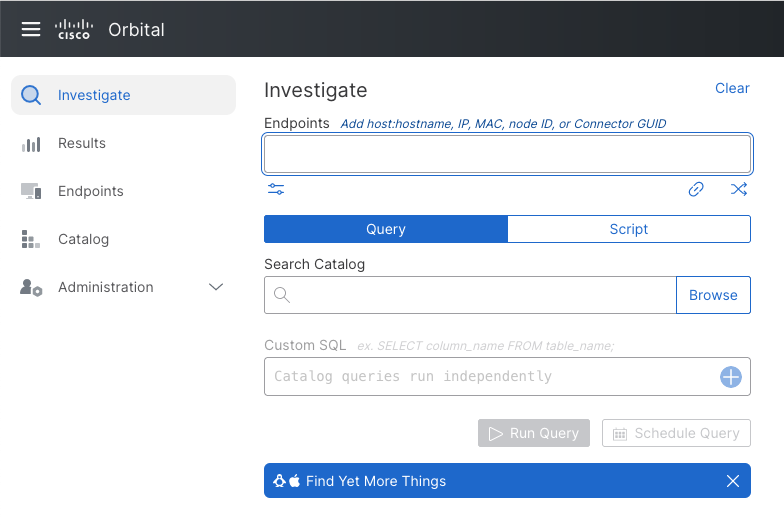
Use Orbital’s Investigate page, shown in the figure below, to construct and run ad hoc queries across identified endpoints, in order to gather system information about them.
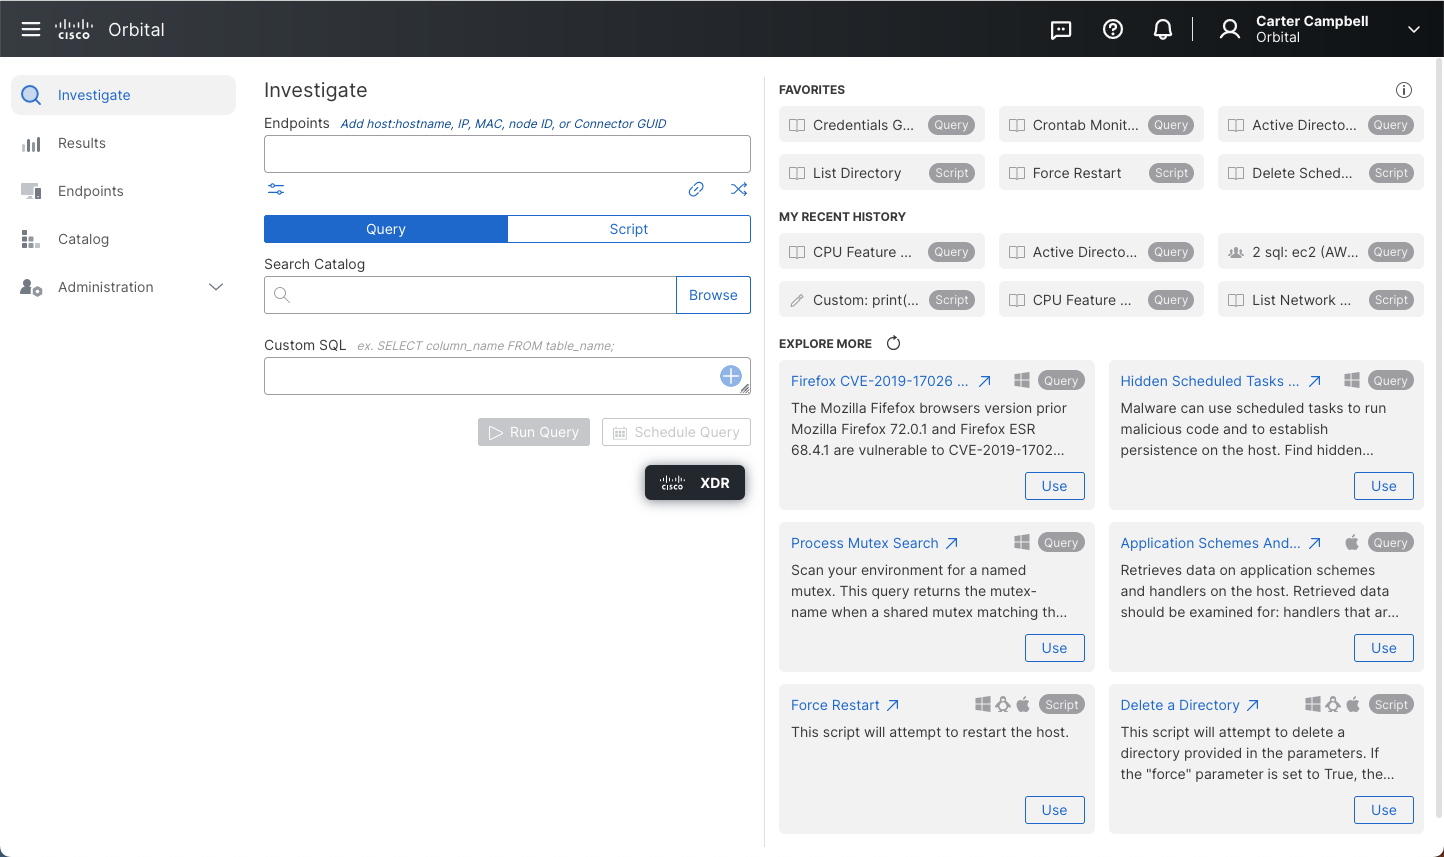
There are several avenues you can take to access Orbital’s Investigate page:
-
From Secure Endpoint:
-
Select Computers from the Management menu.
-
Select the endpoint you wish to query.
-
Expand the endpoint listing.
-
Click Orbital Query.
Orbital opens on the Investigate page with the GUID of the endpoint you previously selected added to the Endpoints field.
-
-
Open Orbital from inside Cisco XDR or SecureX.
-
Open Orbital directly at the following sites:
- North America - https://orbital.amp.cisco.com
- Europe - https://orbital.eu.amp.cisco.com/
- Asia Pacific - https://orbital.apjc.amp.cisco.com/
If necessary, click Log in with Cisco XDR or Log in with Cisco SecureX to authenticate using your existing Secure Endpoint credentials. Refer to the Cisco Security Cloud Sign On Quick Quick Start Guide for more information on logging in through. Cisco XDR or SecureX.
Endpoints - Choose the Query Target
-
In the Endpoints field, enter the ID of one or more endpoints in your organization that will be queried for information, as shown in the figure below.
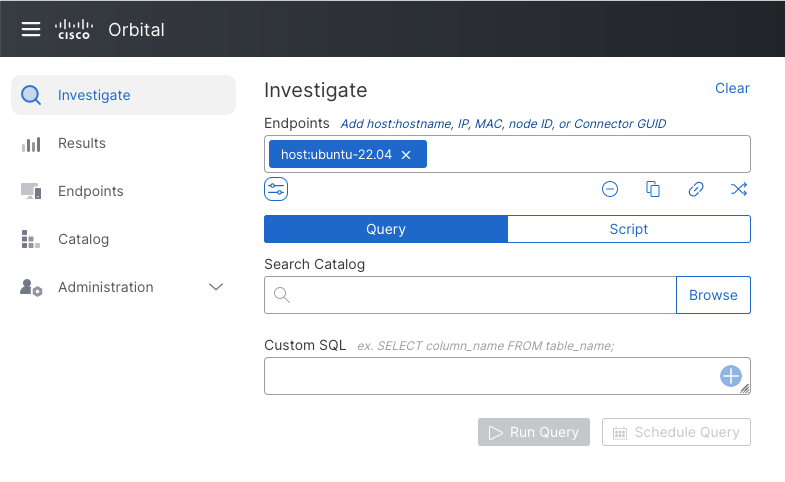
To remove an endpoint from the field, click the X at the right end of the endpoint label.
a. You can add multiple random endpoints. Click
 at the right end of the field, as show in the figure below.
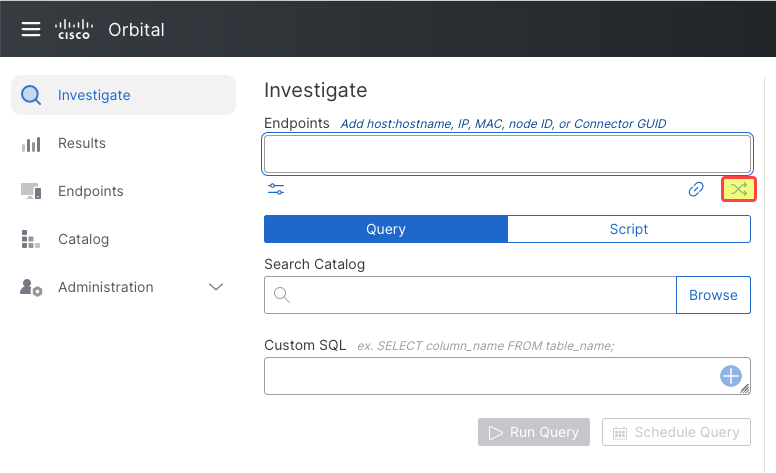
The Add Random Endpoints dialog opens:
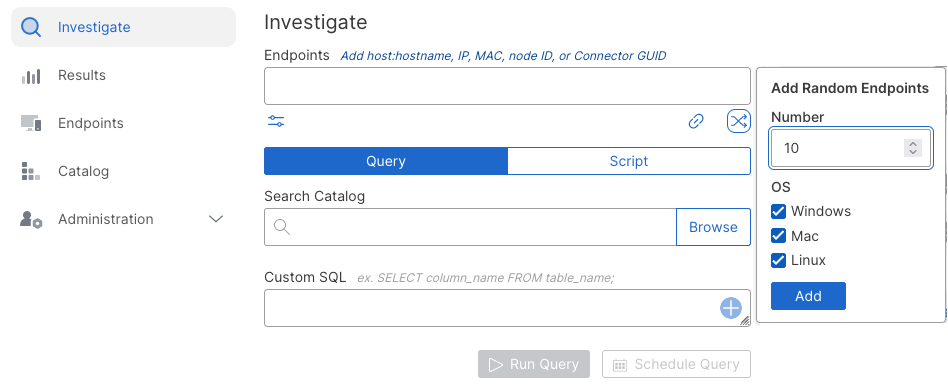
Note: The default value for the Endpoints field is 10, it is not the maximum number of endpoints you can include in a query. This value can be changed by either typing in a new number into the field or using the up and down arrows to specify another number.
b. Type the number of random endpoints you wish to run the query against into the Number field, if you wish to include more or less than ten endpoints.
c. Click Add. The endpoints are then added to the Endpoints field, as shown in the figure below.
SQL - Enter a Query
You can type in or paste a SELECT statement in the SQL field, or select one from the Query Catalog.
-
Click Browse Query Catalog. The Query Catalog dialog opens:
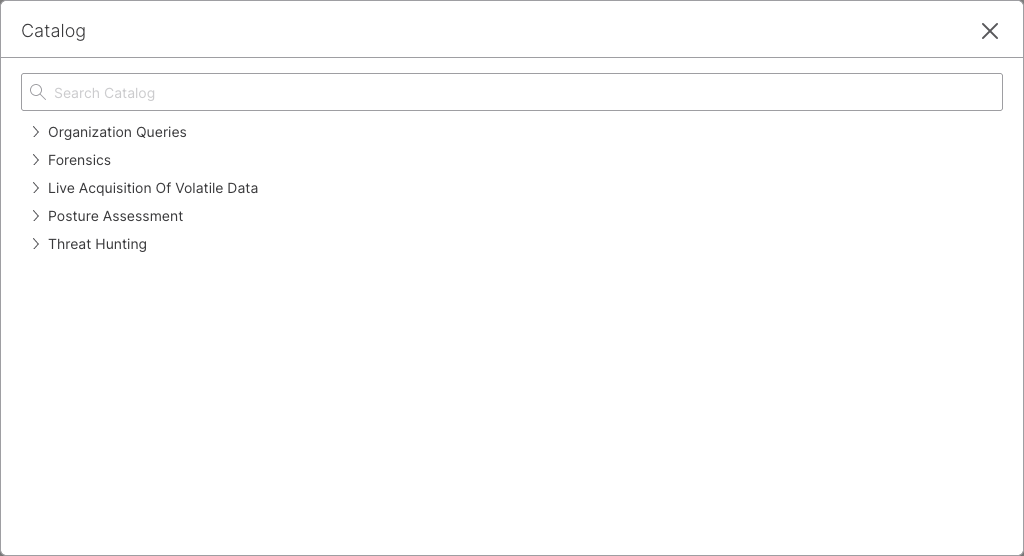
This catalog contains a rich collection of pre-defined queries that have been created by the Orbital engineering team and TRE (Threat Research for Endpoint) to help you get started. This information should help you quickly learn the power of Orbital and osquery for threat hunting.
A Search field appears at the top of the dialog. The query list will automatically adjust to display only those catalog queries that contain the search term(s).
-
Click on a query name to view detailed information:
-
Choose a query from the list. This will display the selected query details in the Catalog dialog, as shown in the illustration below.
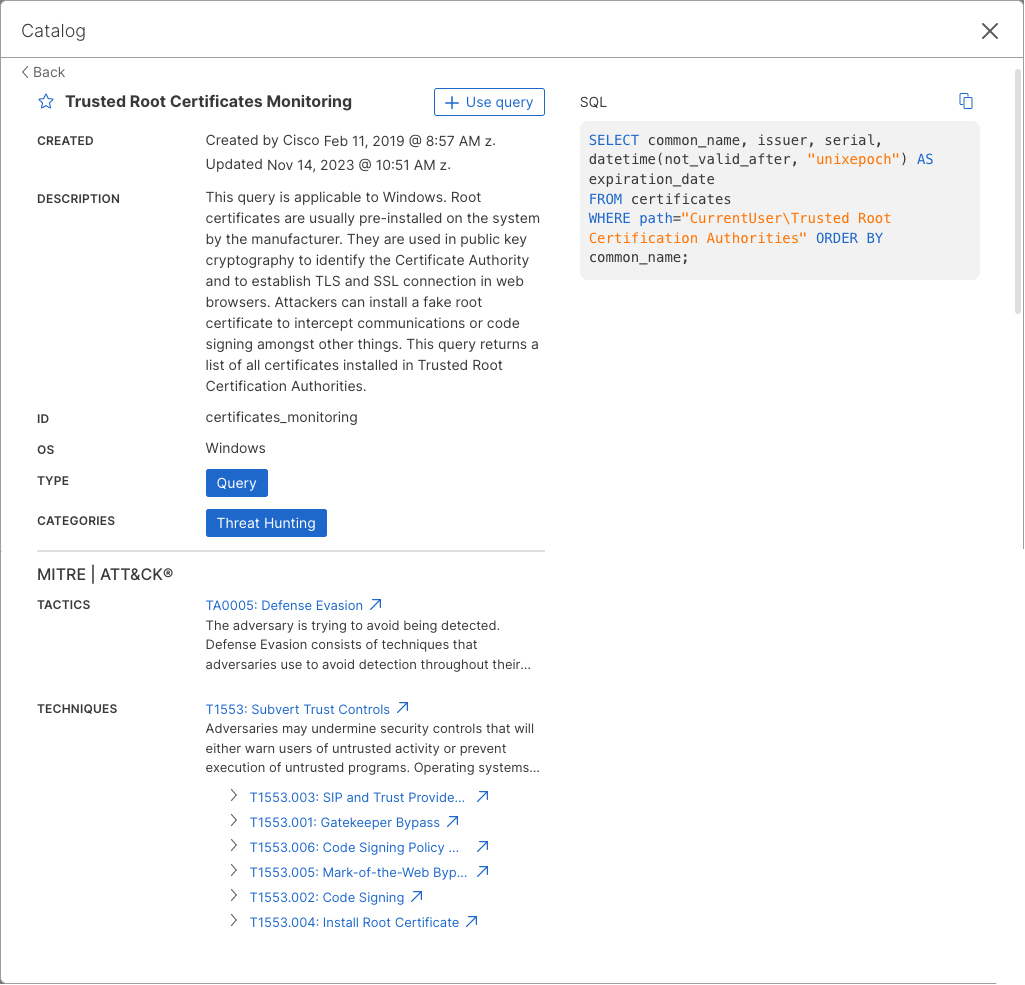
The query detail dialog includes a detailed query description, plus the ID, OS, Categories, ATT&CK™ Techniques and Tactics, information and warning messages, and the SQL SELECT statement. You can copy the SQL by clicking the clipboard icon, or click the + icon to add the SQL statement to your query:
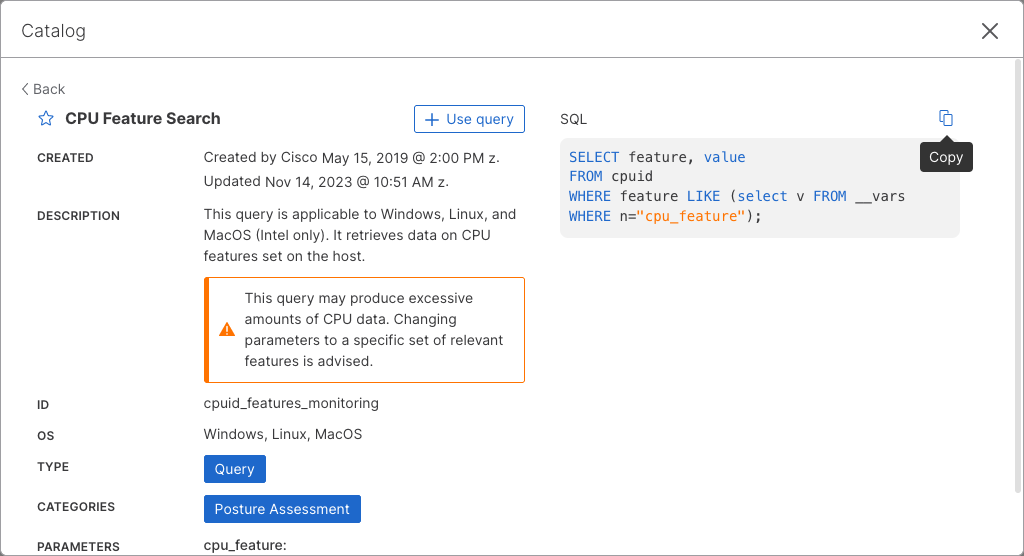
Note: Some catalog queries will require additional parameters once they have been added. These queries, shown in the figure below, will display one or more Parameters fields describing the required information after they’ve been added.
Note: The SQL statements of queries added from the Catalog will be hidden by default. To display the SQL, click on the name of the catalog query.
Other useful cataloged queries to start with include:
- Inventory System Information
- Process Mutex Search
- SHA-256 Hash of Running Processes
- Logged In Users
Note: Any values or parameters you enter into the Investigate page fields will be retained if you move to another page or tab, then return to the Investigate page. However, if you click Clear, refresh your browser, or your Orbital session expires, any values entered into the Investigate page fields will not be retained.
Running an Organization Query From the Catalog
Follow the steps below to run an organization query:
-
Click Investigate to open the Investigate page shown in the figure below.
-
Define the endpoints that the query will be run against.
a. Enter the ID for one or more of your organization’s endpoints in the Endpoints field, shown in the figure below.
or
a. Click the
button located under the lower-right corner of the Endpoints field, as shown in the figure below, to add multiple random endpoints.The Add Random Endpoints dialog, shown in the figure below, opens:
b. Select the desired operating system or system(s) from the Add Random Endpoints dialog.
c. Click Add. The selected endpoints are added to the Endpoints field, as shown in the figure below.
-
Define your query by selecting an existing query from the Orbital Catalog.
a. Click Browse Query Catalog. The Query Catalog popup window opens as shown in the figure below.
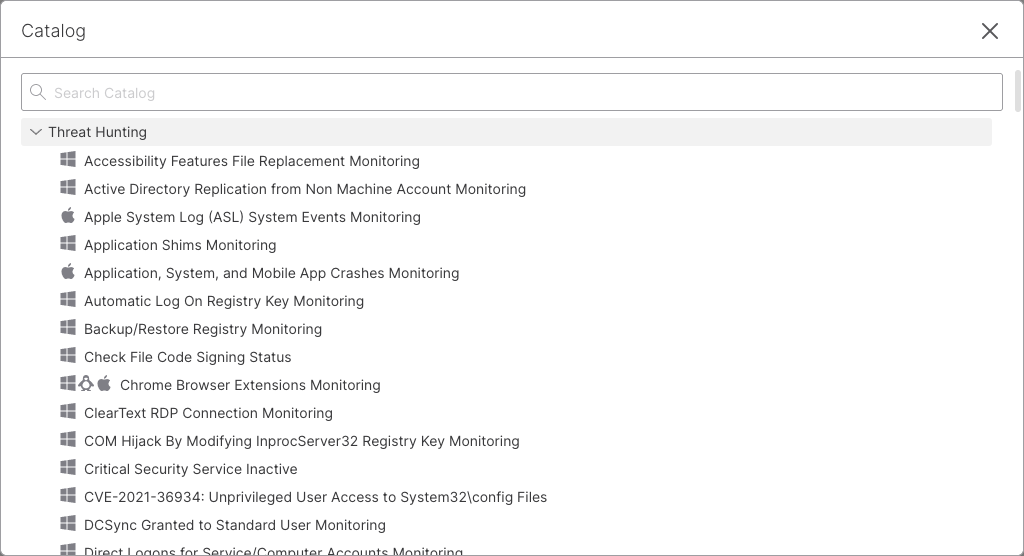
b. Type the name of the query you wish to run in the Search field. The query list will automatically adjust to only include the catalog queries that contain the search term(s).
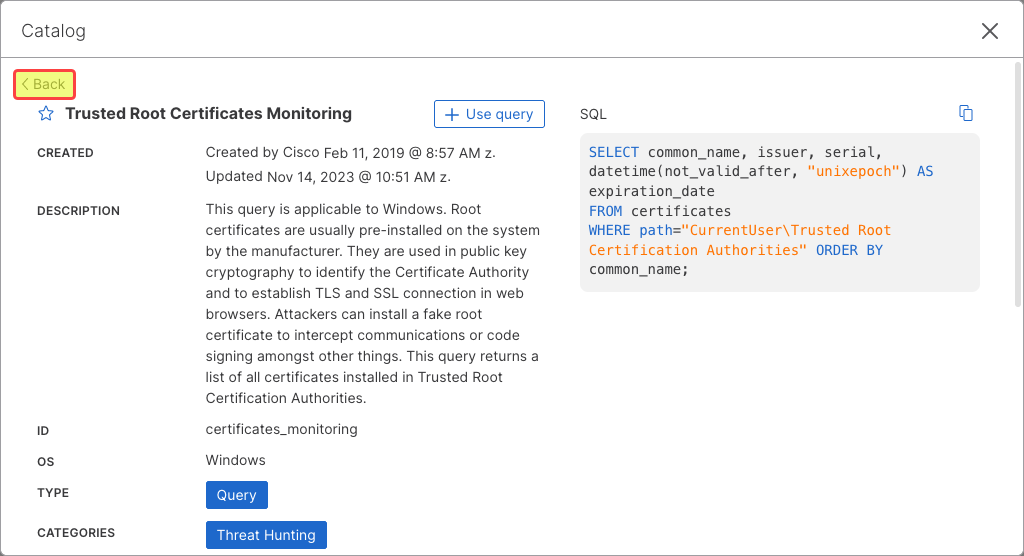
c. Click on the desired query name to view its detailed information, shown in the figure below.
Review the contents of the query’s detailed information and decide if you wish to use the query or not.
- If you decide not to use the query, click the Back button, shown in the figure below, located in the top-left of the page to return to the query search list.
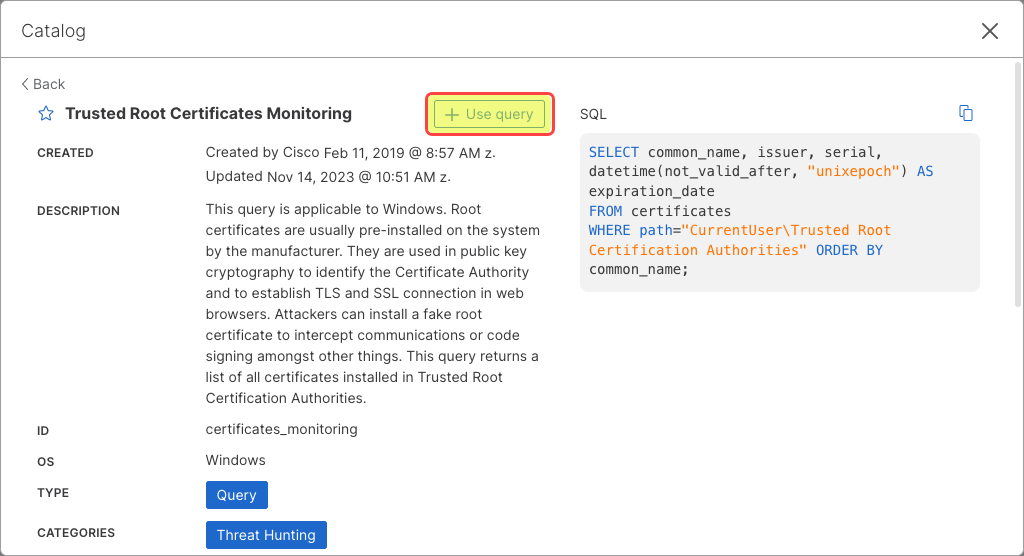
d. When you have found the query you wish to run, click Add to Query, shown in the figure below.
e. Add any required parameters in the Parameters field, shown in the figure below, if the query requires you to specify them.
-
Click Run Query to run the query and view the results. The results will be returned in the right-side pane, shown in the figure below.
Saving A Query To the Catalog
To save a custom query to the Orbital catalog:
-
Navigate to Orbital’s Query page, as shown in the first figure of this topic.
-
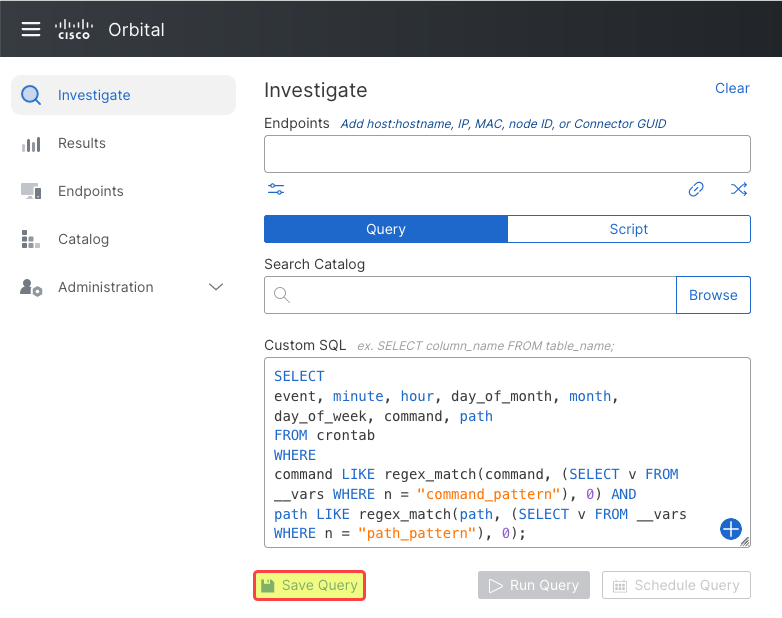
Place your cursor in the Custom SQL field, shown in the figure below.

-
Type your SQL statement into the Custom SQL field. You will notice that as you type your SQL statement, the Save Query button is displayed, as shown in the figure below.
-
If you need to type a multi-statement query, click the plus located at the right end of the Custom SQL field, shown in the figure below.
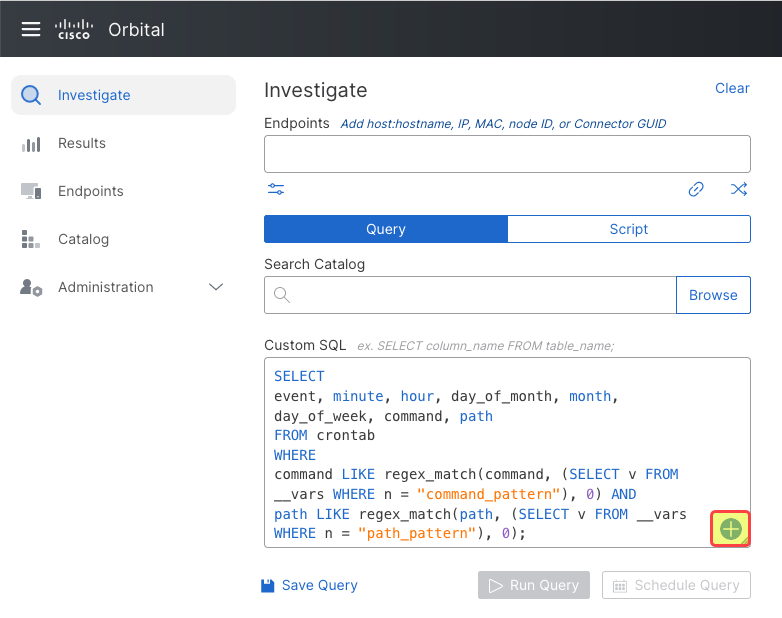
This will clear the Custom SQL field and place the previous SQL statement at the bottom of the page.
-
-
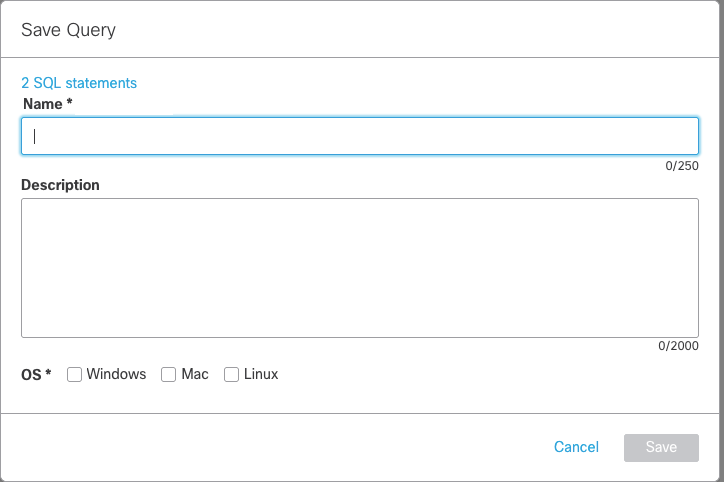
Click Save Query. This will display the Save Query dialog, shown in the figure below.
-
Type the name that the query will be saved under in the catalog in the Query Name field.
-
Type a description of the query into the Description field.
-
Select the operating system or operating systems that the query will be run against, using the OS checkboxes. This defaults to no operating systems selected. Once you have selected one or more operating systems, the Save button will be displayed.
-
Click Save. This will remove the Save Query dialog from the screen and return to the Query page. The newly saved query is listed at the bottom of the page, as shown in the figure below.
Custom Query
To send the query to the specified endpoints click Run Query. The results will be returned in the right pane:
Study the results and the SQL statement to learn how to edit catalog queries and write your own SQL to follow your investigation wherever it leads. You can edit the query and click Run Query again; the results will refresh.
Download
The Download function allows you to download the records of all the results of the active ad hoc query. The records retrieved using Download can be either formatted in a Comma Separated Value (CSV) file or a JavaScript Object Notation (JSON) file.
To download the active ad hoc query results:
- Click Download. This will display the file type selector, as shown in the figure below.
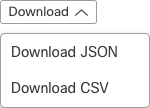
- Select the file type, either JSON or CSV. This will display the Preparing download… message, as shown below.

When the results file is ready to download, Orbital will display the download is ready message, as shown below.

-
Click download is ready.
This will download the ad hoc query results in a ZIP file.
More Info
- What is osquery? - Help topic on osquery
- About osquery - osquery website
- Query Basics