Orbital Settings Remote Data Stores Page
The results from scheduled queries can be sent to a location known as a remote data store, which comes from either a list of webhooks that have been configured by your organization, or a definition provided when creating the scheduled query in the API. All of the current remote data stores are listed on the Remote Data Stores page in the Administration group.
Under The Hood
Orbital integrates natively with Amazon S3™, Azure™, and Splunk™. When choosing these destinations through the UI, the necessary information is collected to authenticate according to their protocols. For any custom destinations, Orbital will attempt to do the following, both upon creation to verify the existence of the data store, and when sending out result payloads:
- An HTTP POST request, and expect a 200 response code.
- Send the following header when a token is provided:
Authentication: Bearer <token>. - Validate the server certificate using well known CAs when a fingerprint is not provided, and the provided fingerprint otherwise.
Destinations for Remote Data Stores
When setting up an Amazon S3 remote data store, here are some details to be aware of:
- If you’re not sure, the default URL of s3.amazonaws.com is usually the right one to use.
- The following permissions must be granted to the user/policy whose credentials are being used:
- ListBucket(s) for at least the given bucket (used to determine if bucket exists)
- PutObject
- See Amazon S3 documentation for additional details.
When setting up a Azure remote data store, you will need to connect it to Orbital. The parameters required to connect Orbital to Azure are:
- The Azure container’s URL.
- The Azure container’s name.
- The Azure container’s SAS token.
When setting up a Splunk remote data store, here are some details to be aware of:
- The sourcetype you select should be _json.
- An example URL showing the typical input path is
https://prd-p-2gzy9.splunkcloud.com:8088/services/collector - Users can use the search term
source="orbital"to find Orbital data inside Splunk. - See the Splunk documentation for additional details.
Regional NAT IP Addresses
The following is a list of the regional NAT IP addresses:
| Region | 1st IP Address | 2nd IP Address | 3rd IP Address | ||||
|---|---|---|---|---|---|---|---|
| EU | 52.29.47.197 | 52.57.222.67 | 52.58.172.218 | ||||
| NAM | 34.223.219.240 | 35.160.108.105 | 52.11.13.222 | ||||
| APJC | 52.194.143.206 | 52.69.138.67 | 54.95.9.136 |
Note: All of the regional NAT IP addresses listed above make use of random, high port numbers.
Remote Data Store Errors
Any remote data store errors will be displayed in Orbital’s remote data store dropdown lists, similar to the one shown in the figure below.
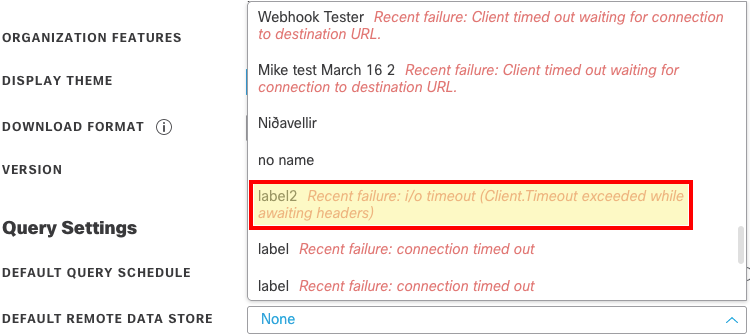
These lists are located in the My Account page of the Administration group and the Schedule Orbital Query popup of the Investigate page.
The error message will appear in red, italicized text beside the remote data store listing in the dropdown.
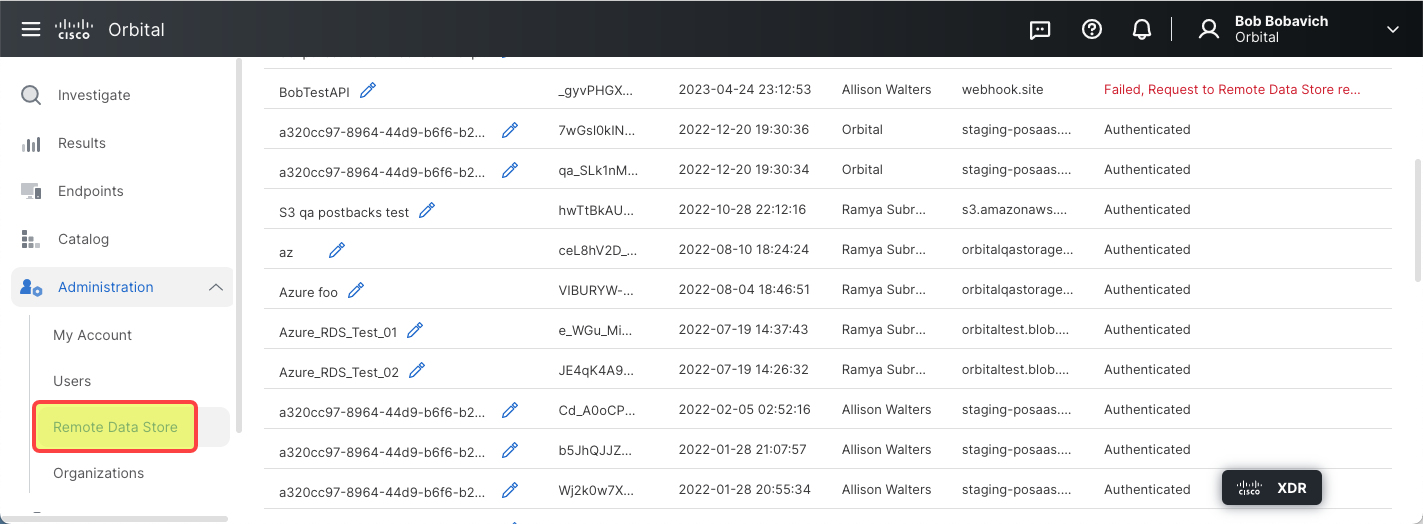
Managing Your Remote Data Storage Definitions
You can manage your remote data store settings from your Remote Data Store page in the Administration group. To access your Remote Data Store page, select the Remote Data Stores page, shown in the figure below.
Note: Orbital will not send results that are over 250 Megabytes in size to a remote data store.
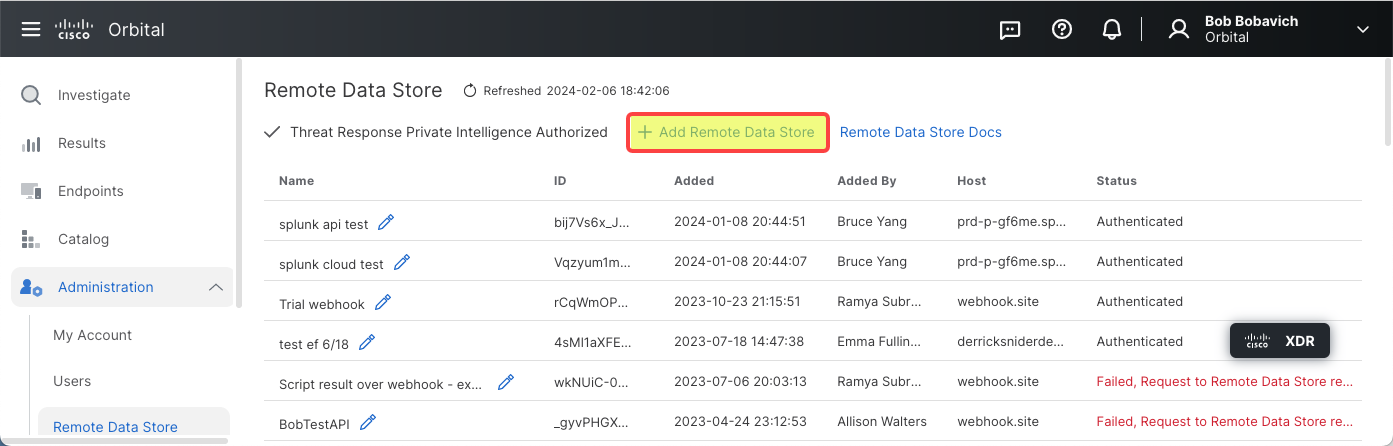
Adding a Remote Data Store
Orbital allows you to define a new remote data store that can then be used to store the results of your queries. To add a new remote data store:
-
Click Add Remote Data Stores, as shown in the figure below.
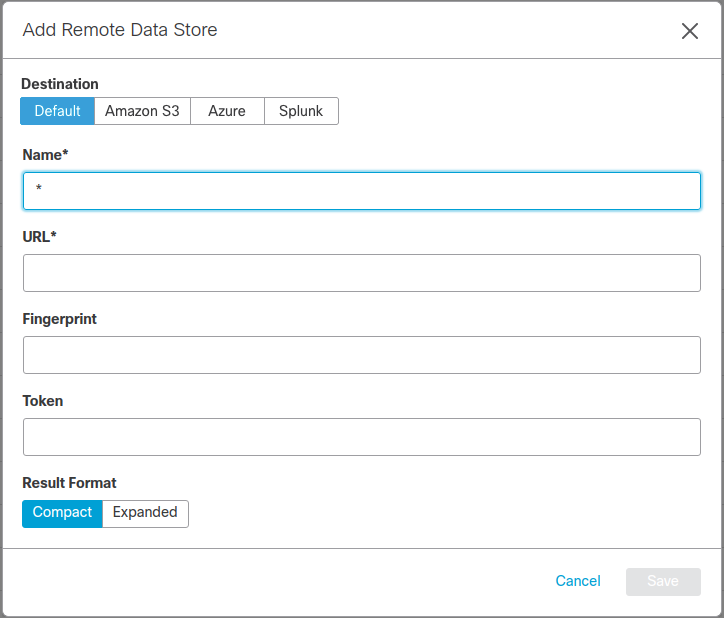
The Add Remote Data Store popup opens, as shown in the figure below.
-
Type the necessary information into the popup’s fields:
- Destination - Orbital integrates with Amazon S3™, Azure™, and Splunk™, as well as any custom data store that can receive an HTTP POST, authenticate, and be verified as described in the Under The Hood section.
- Name - (Required) A unique name for the new data store.
- URL - (Required) The URL location for the new data store.
- Fingerprint - (Optional) See the fingerprint section below for details.
- Token - (Optional)
- Format - For addition details on results formats, view the details here.
Note: The Destination, Name, and URL fields must have information entered into them.
-
Click Save. The data store is added to the list, and may now be selected as a destination for results when scheduling a query.
Editing a Remote Data Store
There may be times when you will need to edit a remote data store’s definition. To edit an existing remote data store:
-
Navigate to the remote data store listing that you will edit.
-
Click Edit ( the pencil icon
 ) to the right of the remote data store’s name.
This will display the Edit Remote Data Store popup, as shown in the figure below.
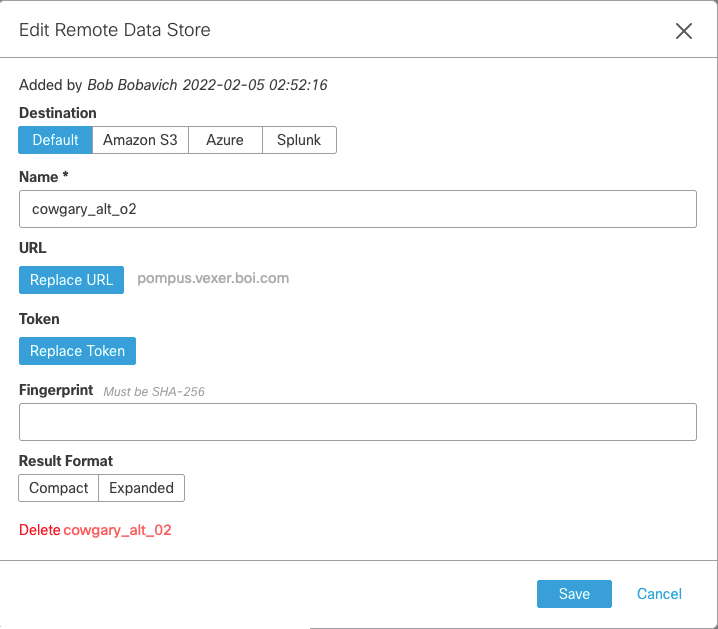
-
Modify the desired values in the Edit Remote Data Store popup’s fields in accordance with the field definitions above.
-
Click Save. The modified data store information is saved to the data store’s definition.
Deleting a Remote Data Store
There will be times that you will need to delete remote data store definitions. This could be due to a remote data store service no longer being available or no longer conforming to necessary requirements. To delete an existing remote data store:
-
Navigate to the remote data store listing that you will edit.
-
Click Edit ( the pencil icon
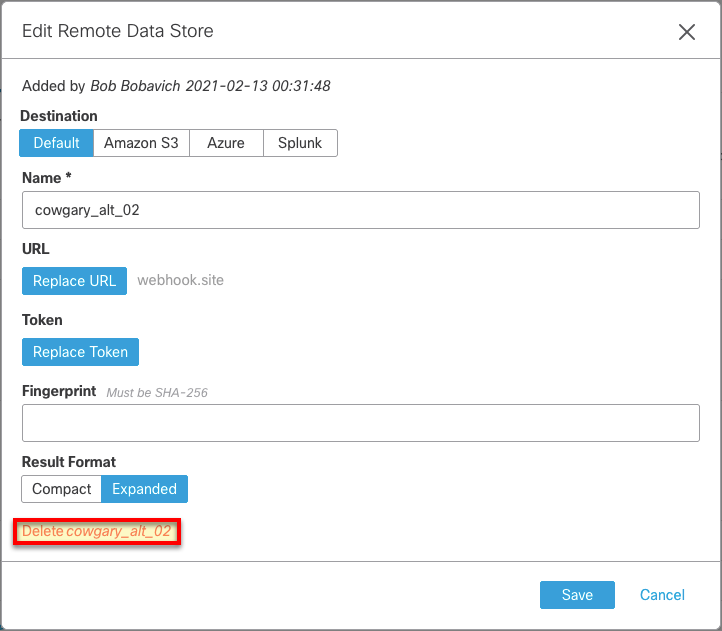
) to the right of the remote data store’s name.This will display the Edit Remote Data Store popup, as shown in the figure below.
-
Navigate to the Delete prompt at the bottom of the popup, as shown in the figure below.
This will display the Delete Confirmation Prompt, as shown in the figure below.
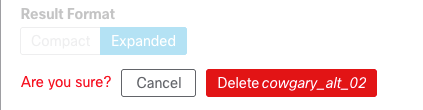
-
Click the Delete [Remote Data Store Name] button. This will remove the remote data store definition from Orbital and refresh the remote data store list.
Setting the Default Remote Data Store for Your Profile
Orbital allows you to set one or more of the defined remote data stores as the default data store or stores for your profile. This data store will then populate the Remote Data Store dropdown in the Schedule Orbital Query popup. To set the default remote data store for your profile:
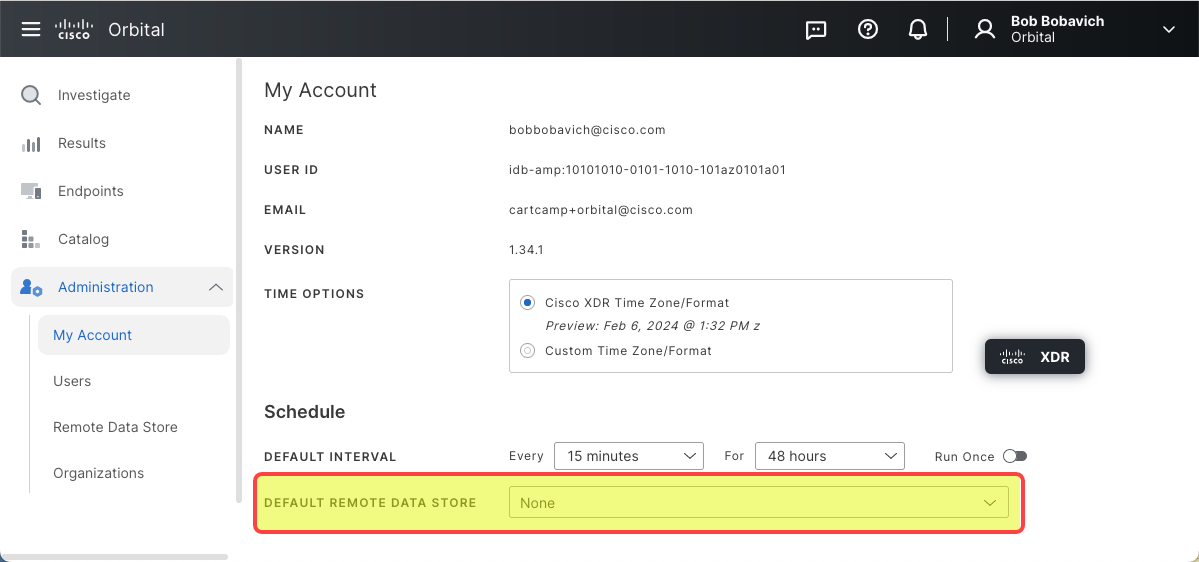
- Select the My Account page from the Administration group, as shown in the figure below.

-
Navigate to the Default Remote Data Store dropdown, shown in the figure below.
-
Click the dropdown.
-
Navigate to the desired remote data store.
-
Click the desired remote data store.
Setting Multiple Default Remote Data Stores
If you wish to set multiple remote data stores as you default data stores:
-
Click the Default Remote Data Store dropdown to expand it.
-
Navigate to the desired remote data store listing.
-
Select the desired remote data store so that it is displayed in the Remote Data Store dropdown’s field.
-
Expand the Default Remote Data Store dropdown again.
-
Navigate to the next desired remote data store listing and select it.
-
Repeat until you have selected all of the required remote data stores.
Note: In order to delete a remote data store listing, click on the X beside the data store’s name.
Fingerprints for Remote Data Stores
Results can be sent to a Remote Data Store over an encrypted HTTPS connection for endpoints with a valid and signed TLS certificate. For self-signed certificates the SHA-256 fingerprint of the certificate can be provided, which Orbital will use to verify the certificate presented by the remote host. To obtain the fingerprint:
-
Browse to the desired site.
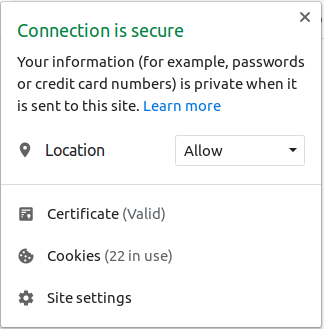
-
Click the small lock icon in the URL, revealing this popup:
-
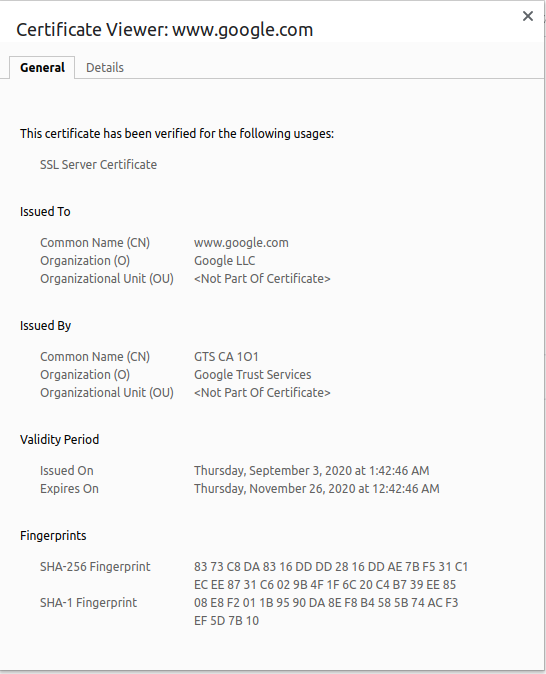
Click on Certificate; which reveals this popup:
-
Copy the characters from the SHA-256 section, 83 73 C8 DA 83 16 DD DD 28 16 DD AE 7B F5 31 C1 EC EE 87 31 C6 02 9B 4F 1F 6C 20 C4 B7 39 EE 85 in this case. They can be copied and entered directly into the fingerprint edit box.
The fingerprint can be also obtained by running the following command on the certificate directly:
> openssl x509 -noout -fingerprint -sha256 -inform pem -in <filename>.crt
SHA256 Fingerprint=8D:BD:63:6C:9D:D9:F5:CF:33:43:63:31:AF:20:74:7C:59:55:56:78
Please contact your host admin if you have questions about certificates and fingerprints.